An error in Valorant "Failed to establish required dependencies" is related to a Vanguard anti-cheat that you cannot play without.

Most often, a dependency error appears on Windows 7. On Windows 10, the problem also occurs, but is usually fixed by simply rebooting the computer or clicking the Update button to notify the error itself.
Not only the general recommendations for correcting the error that the developers give on the official website are analyzed below. We have made the most complete list of possible reasons and methods that can help. When writing an article, answers from real users who managed to solve the problem of setting dependencies were also taken into account.
For each, the solution method will be individual, so in the absence of a positive result, it is recommended to use all available methods. If the problem does not disappear in any way, then the priority is to write to Valorant support.
No dependencies set - what to do?
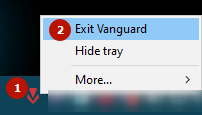
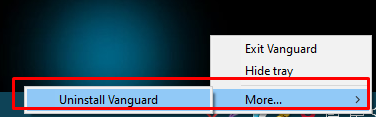
- Remove the Vanguard anti-cheat and reinstall. First you need to disable the anti-cheat. Right-click on the Vanguard icon and select Exit Vanguard.
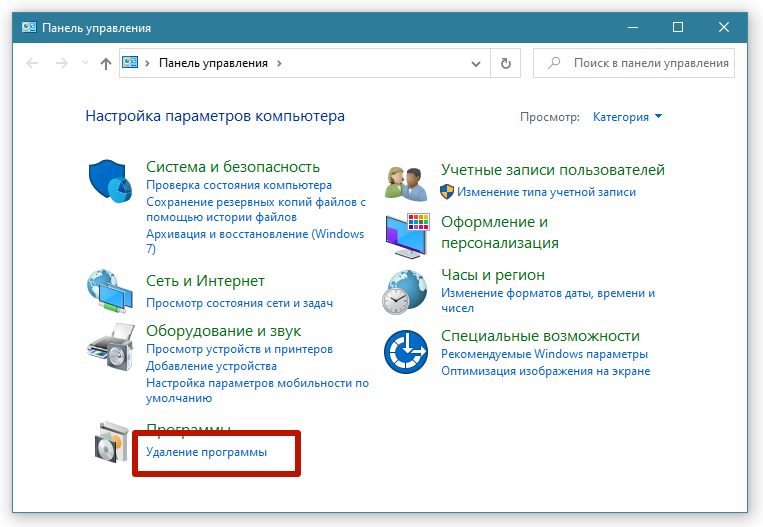
 Next, you can delete Vanguard in several ways. Alternatively, through the standard Remove Programs tool, which is available in all versions of operating systems (see screenshots under the spoiler).In new updates, deletion is possible through the tray icon - open the More icon in the context menu and select Unistall Vanguard.ViewWindows10
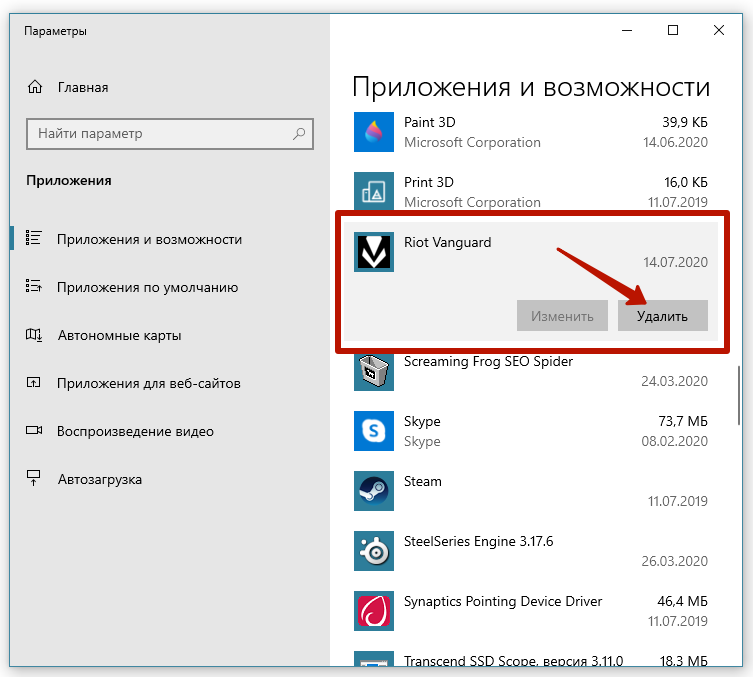
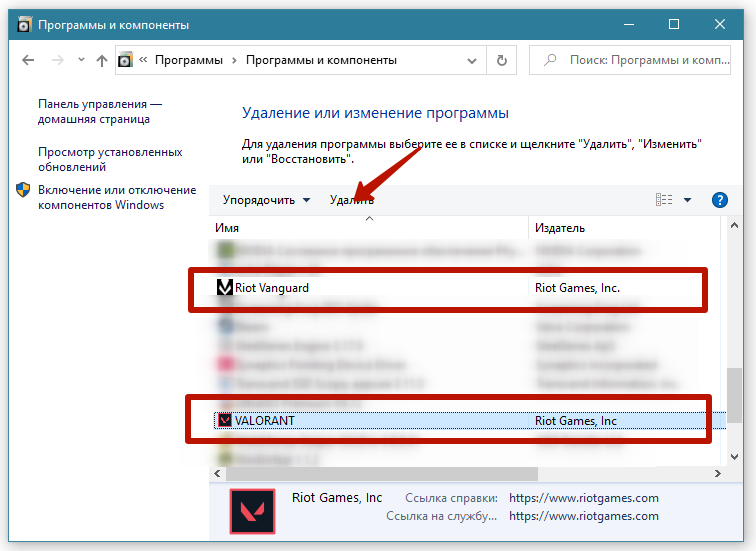
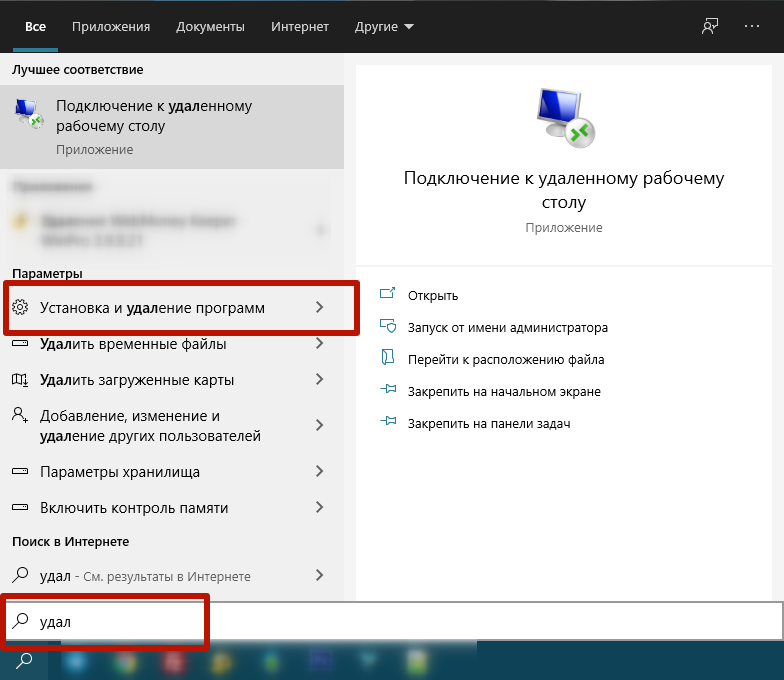 Scroll down until a list of all installed applications on your computer appears.
 Windows 7, 8 (will also work on the Ten)
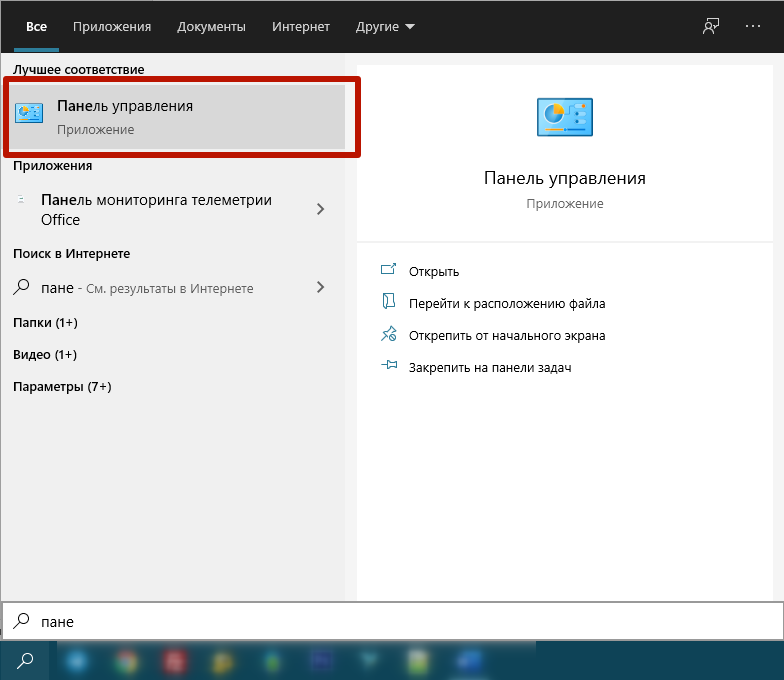
 To install an anti-reader, you just need to run the Valorant game shortcut and the installation will begin automatically. Afterwards, immediately reboot the PC without starting the game and check if the error is missing.
 - Remove Valorant completely. Install the latest updates on Windows, including updating your graphics card drivers. It's about installing service packs sequentially, first KB4474419, then KB4490628. Update GPU driver at end. Be sure to reboot after installing each update. Next, disable antivirus and Firewall, install Valorant client from scratch. If there is no installation file, here is the link: download Valorant. Wait until all components are installed, including anti-cheat. Play button is not clicked, but immediately close client. Reboot Windows, error should disappear. Additionally, it is recommended to add a folder with Vanguard and Valorant to antivirus exceptions.
- Set the game launch settings in Compatibility mode Click the PCM on the game shortcut, select the Compatibility tab, and check the Run program in Compatibility Mode 7/8.1/10 box
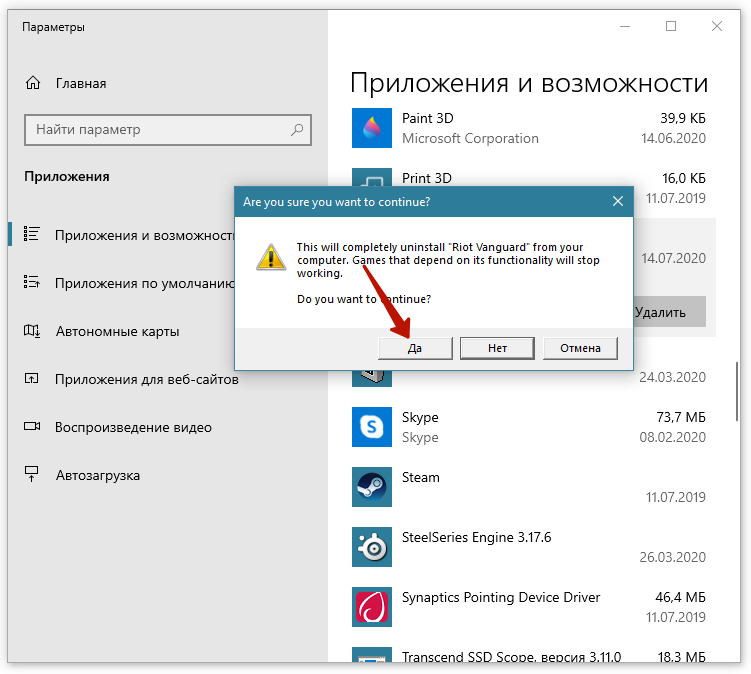
The last step, when you need to completely uninstall the game along with the anti-cheat, is a radical way, if it hasn’t helped, then you need to turn to support.
Watch the detailed video.
Additionally
Special utilities have been developed for updating "wood" video cards:
- nVidia - GEFORCE EXPERIENCE https://www.nvidia.com/ru-ru/geforce/geforce-experience/download/;
- multiple programs can be used for Radeon https://www.amd.com/ru/support/kb/faq/gpu-131.
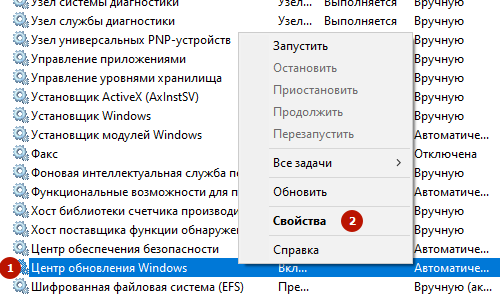
If an error occurs when installing the packages described in paragraph 2, you may have the service responsible for system updates disabled - Windows Update. Go to Services. To do this, click the Windows+R key combination, type services.msc, and click OK
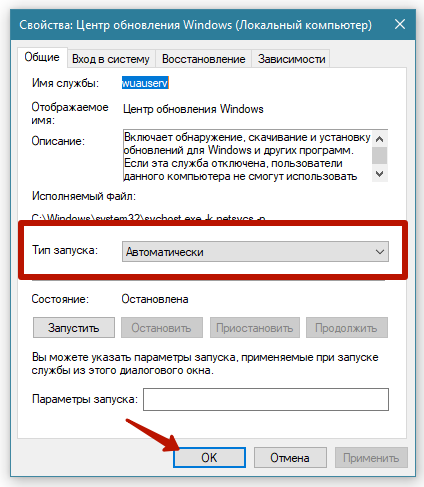
Find the service, open properties via the PCM click, and set the startup type Automatically, restart the system. Try running updates again.
We hope that the material helped you deal with the error of the necessary dependencies.
Be sure to write down in the comments about the result, and preferably tell us what method worked to make it easier for future players.